


Must Have Supplies:
Grow Digital Scrapbook Kit (Those Alpha’s are a must have!)
Your Favorite Font Pairing (Something simple is best) Pictures ( 26 to be exact!)
Printer (I love my Epson WF-7510)
Paper (I used Matte Solar White Paper in 11x17” Size)
Laminator (I like the Royal Sovereign 9-Inch Laminator) Lamination Pockets (I used Legal Size Pockets)
Brads (I prefer 1/8” matte black ones)
Packing Tape (This stuff is amazing)
Elastic Cording Metal Ruler (You’ll be doing some scoring!)
1/16” Hole Punch Awl
Recommended Supplies:
Adobe Photoshop, Adobe InDesign
The How To:
Prepare Your Book Digitally: I started my book by deciding what size I wanted it to be! I wanted each alpha and picture page to be square and I landed on a 4” x 4” size and began to make my book digitally. To do so, I started by making a template in Photoshop for the Alphabet Pages, and the Picture Pages . I simply made a 4” x 4” canvas size at 300 dpi, grabbed my Grow Alphabet .png file and got to work. Once I had the placement and sizing of my wood veneer alphabet and the font pairing for my wording underneath, I simply went through and sized each individual A-Z letter and decided what each word would stand for, typing that below. Easy Peasy. Then, after rounding up images for each of the letters I simply started a 4” x 4” canvas for those and created one Photoshop file with all the images in separate layers. I then saved each file in a separate folder and was ready for the next step.


Preparing for Printing: To prepare for printing I opened up Adobe InDesign and started a template for my book by creating an 11” x 17” canvas with two vertical columns with (4) 4” x4” square outlines and replicated that 7 times (enough for the entire alphabet). I then simply went through and dropped my cover page, and each letter with coordinating picture into one 4” x 4” space and my printable file was ready to go. Because I have a wide format printer I was able to print onto 11” x 17” paper. If you don’t have that option, simply do this process on Letter sized paper. You’ll simply have more pages to print is all!

Print and Trim:
Once your file is prepped in InDesign, simply print from there (or export as JPG’s and print through Photoshop). Once you have all your
pages in hand trim around each strip carefully with scissors or a paper trimmer.

Laminate:
I picked up some 9” x 14 1/2” lamination pockets (the largest my little laminator will take. So even though I can’t laminate the full 11” x 17”
pieces that I printed, I simply fit 3 of my squares vertically trimming and aligning the extras where need be, and then I aligned another 3 on
the right side and was ready to laminate! Make sure you let them cool flat and then trim closely around each column.

Create Your Book:
Attaching:
To make your accordion book you’ll simply need to attach each strip to the next. Beware - with all letters of the alphabet and images, it will
become quite long but don’t worry, it’s a pretty simple process! Place your first strip face down, align the next slightly overlapping the laminate part, grab a piece of packing tape and smooth over the seam trimming the edges when you’re done. If you grab the edge of your scissors and
rub the bubbles out (or you know, a bone folder!) you can’t even tell you've attached them!
Folding:
To get the lamination to fold properly for your accordion, you’ll need to slightly score the back side at each folding point. I simply grabbed my
metal ruler and aligned it over each seam, grabbed the point of my scissors and ran it over the lamination lightly. You’ll see a slight indent in
the lamination and when you go to fold it, you should notice it creases easily and doesn't break the lamination.
Continue these two steps until the book is complete!
Closure:
To create the closure I simply grabbed my 1/8” black brads, an awl, a 1/16” hole punch, thin elastic cording, and a piece of the extra lamination
to get started. I punched two small holes on either side of the top on the back piece of the book, threaded the elastic cording through and
double knotted it on one side. Then I used the awl to punch a hole in the center of the exclamation point where I will create the disk closure.
Because I wanted my disk to be durable, I simply folded an extra piece of the melted lamination (off the bottom of my book pieces) three
times and trimmed a small circle. I punched a hole with my hole punch in the center of the disk layers, threaded a brad through and attached
the disk through the book piece with the brad. I then pulled the elastic cording around the disk and back to the other hole I had punched in
the back cover. I threaded it through the hole, pulled tight and double knotted before I snipped the length of the cord. This was to make sure
the book would be held tight and there wasn’t too much or too little cord available. I punched and added four brads to the front of the book
corners for decorative addition which is totally optional but I think adds a cute touch to the book!
Now ... A Closer Look!
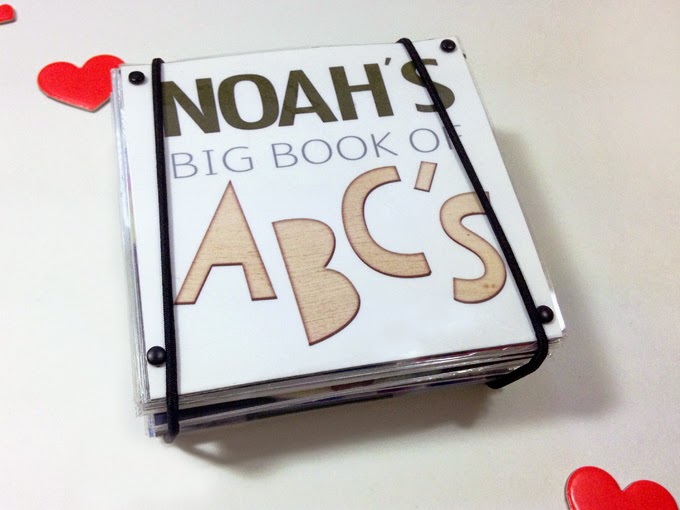


So glad you stopped by for this little hybrid project! I hope you’ll head over to the Little Lamm & Co. shop and pick up the adorable Grow
Scrapbook Kit and get to working on your own little mini book. This project was pretty simple and it would make a great gift - or just make
one for yourself of your favorite things! Till next time...
Xo,
Cecily | The Paper Curator
Products used:


Hi! I’m Cecily, an avid scrapbooker + coffee drinker + pursuer of happiness. A fashion designer by trade, I use the knowledge from my art and design background to create unique, artistic keepsakes with an emphasis on color, typography, and texture. I live my New York life to the fullest while curating it into paper keepsakes to share.
No comments:
Post a Comment